Looking for the best Ninja Creami recipes? You’re in the right place! This innovative kitchen appliance lets you whip up smooth, delicious frozen treats like ice cream, sorbet, and gelato with ease. In this guide, we’ll explore classic flavors, unique creations, and kid-friendly desserts to inspire your next sweet treat. Plus, we’ll share troubleshooting tips and creative ideas to help you make the most of your Ninja Creami. Get ready to transform your kitchen into an ice cream parlor!
Table of Contents
What is the Ninja Creami?
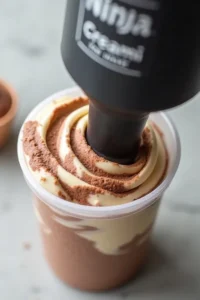
Healthy Ninja Creami Recipes for Any Diet
The Ninja Creami is an innovative kitchen appliance designed to make homemade frozen desserts effortless and fun. Whether you’re an experienced home chef or a beginner in the kitchen, this compact machine enables you to create creamy, customizable frozen treats in just a few steps.
you might enjoy exploring brining chicken techniques to enhance flavor.
Overview of the Appliance
At its core, the Ninja Creami is a high-powered blender-like device that processes frozen bases into smooth, velvety desserts. What sets it apart is its specialized Creamify Technology, which shaves and churns ingredients to replicate the texture of traditional ice cream. Unlike traditional ice cream makers that rely on constant churning and freezing, the Ninja Creami works on already-frozen bases, making the process quicker and more efficient.
Key Features of the Ninja Creami
- Multiple Preset Programs
The Ninja Creami comes with pre-programmed settings, such as ice cream, sorbet, gelato, smoothie bowl, and milkshake modes. These settings ensure the perfect texture for each type of frozen treat. - Customizable Flavors
You’re not limited to pre-made mixes or store-bought flavors. With the Ninja Creami, you can create unique recipes using your favorite ingredients, dietary preferences, and creativity. - Compact Design
Its small footprint makes it ideal for kitchens of any size. Despite its compact design, the machine is powerful enough to handle frozen bases with ease.
Benefits of Owning a Ninja Creami
- Versatility
Beyond ice cream, the Ninja Creami can handle sorbets, gelatos, frozen yogurt, and even creamy milkshakes. It’s a one-stop shop for all things frozen. - Healthier Options
You have complete control over the ingredients you use. Whether you want to avoid processed sugars, include more fruits, or experiment with plant-based alternatives, the Ninja Creami lets you tailor recipes to suit your lifestyle. - Ease of Use
The Ninja Creami simplifies what can otherwise be a time-intensive process. With minimal preparation and a user-friendly interface, you can enjoy homemade desserts without the hassle.
Why the Ninja Creami is a Game-Changer
Traditional ice cream makers often require bulky setups, long freezing times, and sometimes even the use of rock salt or ice. The Ninja Creami eliminates these complexities, delivering professional-grade results in the comfort of your home. It’s particularly appealing to families, as kids can get involved in crafting their favorite flavors.
Basic Techniques for Using the Ninja Creami
Basic Techniques
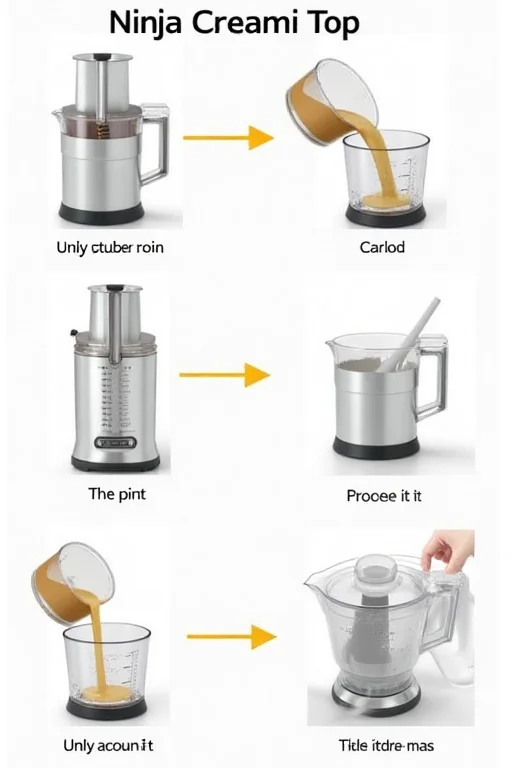
To create the perfect frozen dessert with the Ninja Creami, it’s essential to understand its functionality and the steps involved. This section breaks down the process, from preparing your base to achieving ideal textures for your creations.
How to Use the Ninja Creami
- Prepare Your Base
The first step in any Ninja Creami recipe is creating the base mixture. This could be as simple as a blend of milk, sugar, and vanilla extract or a more complex mix of fruit, chocolate, or plant-based milk. Once your base is ready:- Pour the mixture into the Ninja Creami pint container.
- Ensure it doesn’t exceed the “MAX FILL” line to allow room for proper blending.
- Freeze the Base
Place the pint container in your freezer for at least 24 hours. This step is crucial as the Ninja Creami works best with fully frozen bases. A consistent temperature ensures smooth, creamy results. - Processing Your Base
After freezing, remove the pint container and place it into the Creami processing bowl.- Lock the container into the machine and choose the desired program (e.g., Ice Cream, Sorbet, Gelato).
- Let the machine process the frozen base, using its unique blade to shave and churn the ingredients into a creamy texture.
- Add Mix-Ins (Optional)
If you want to include extras like chocolate chips, cookie crumbles, or nuts:- Use the “Mix-In” setting after the initial processing.
- This gently folds in your selected ingredients without compromising the texture.
Understanding the Settings
The Ninja Creami is equipped with various preset functions tailored to specific types of desserts.
- Ice Cream Mode: Perfect for dairy-based frozen desserts. It churns the base to create a thick and creamy consistency.
- Sorbet Mode: Ideal for fruit-based or dairy-free treats. It delivers a light and smooth texture.
- Gelato Mode: produces a denser, silkier frozen treat compared to ice cream.
- Smoothie Bowl Mode: Designed for thicker blends, suitable for spoonable smoothie creations.
- Mix-In Mode: A post-processing setting to evenly incorporate chunks of ingredients like candy or fruit.
Essential Ingredients for Success
- Cream or Milk
The base of most recipes starts with a dairy or non-dairy alternative. Full-fat options, like heavy cream or coconut milk, yield the creamiest results. - Sweeteners
Granulated sugar, honey, agave syrup, or sugar substitutes like erythritol can be used. Keep in mind that sugar impacts the freezing point and texture of the dessert. - Flavor Enhancers
Extracts (vanilla, almond), cocoa powder, or spices (cinnamon, nutmeg) can elevate the flavor profile. - Stabilizers (Optional)
Adding a small amount of cornstarch, gelatin, or xanthan gum can help improve the texture and reduce iciness in certain recipes.
Pro Tips for Beginners
- Chill Your Ingredients: Using cold liquids before freezing helps improve the final texture.
- Layer Flavors Strategically: If you’re using mix-ins, ensure they’re evenly distributed by folding them in gently.
- Adjust Sweetness: Always taste your base before freezing, as sweetness dulls when frozen.
Mastering these basic techniques will set you up for success with your Ninja Creami. In the next section, we’ll explore some classic recipes that are perfect for beginners and loved by everyone.
Classic Recipes for the Ninja Creami
Classic Recipes
The Ninja Creami shines when it comes to making timeless, crowd-pleasing frozen desserts. In this section, we’ll explore three classic recipes vanilla, chocolate, and strawberry ice cream that form the foundation of any ice cream lover’s repertoire. These recipes are simple, delicious, and perfect for beginners.
Vanilla Ice Cream
Ingredients:
- 1 cup whole milk
- 1 cup heavy cream
- ¾ cup granulated sugar
- 1 tablespoon pure vanilla extract
Instructions:
- Mix the Base:
Combine the milk, heavy cream, sugar, and vanilla extract in a bowl. Whisk thoroughly until the sugar dissolves. - Pour and Freeze:
Pour the mixture into the Ninja Creami pint container. Seal with the lid and freeze for at least 24 hours. - Process in the Creami:
Remove the frozen pint from the freezer, place it in the Ninja Creami processing bowl, and lock it into the machine.- Select the Ice Cream Mode and let the machine do the work.
- Optional Mix-Ins:
If desired, add mix-ins like chocolate chips or sprinkles and reprocess using the Mix-In Mode. - Serve and Enjoy:
Scoop out the creamy vanilla ice cream and serve immediately, or store it back in the freezer for later.
Chocolate Ice Cream
Ingredients:
- 1 cup whole milk
- 1 cup heavy cream
- ½ cup granulated sugar
- ¼ cup unsweetened cocoa powder
- ½ teaspoon vanilla extract
Instructions:
- Prepare the mixture:
In a bowl, combine the milk, heavy cream, sugar, and cocoa powder. Whisk until smooth, ensuring no lumps remain. Stir in the vanilla extract. - Freeze the base:
Pour the mixture into the Ninja Creami pint container and freeze for 24 hours. - Process the base:
Insert the frozen pint into the machine, select Ice Cream Mode, and let it process until creamy. - Optional Enhancements:
Fold in chocolate chunks or brownie pieces using the Mix-In Mode for added texture. - Serve:
Enjoy the rich, chocolatey goodness of this classic recipe.
Strawberry Ice Cream
Ingredients:
- 1 cup whole milk
- 1 cup heavy cream
- ½ cup granulated sugar
- 1 cup fresh strawberries, hulled and mashed
- ½ teaspoon lemon juice
Instructions:
- Blend the Base:
In a blender, puree the strawberries with the lemon juice. In a separate bowl, mix the milk, heavy cream, and sugar until the sugar dissolves. Combine the strawberry puree with the milk mixture. - Freeze the Mixture:
Transfer the mixture to the Ninja Creami pint container and freeze for 24 hours. - Process and Enjoy:
Use the Ice Cream Mode to process the frozen pint. For a chunky texture, reserve some mashed strawberries and add them during the Mix-In Mode. - Serve:
Savor the fruity, refreshing taste of homemade strawberry ice cream.
Tips for Customizing Classic Recipes
- Adjusting Sweetness:
You can reduce sugar or use natural sweeteners like honey or maple syrup for a healthier twist. - Dairy-Free Options:
Substitute whole milk and cream with coconut milk or almond milk for a vegan-friendly version. - Add a Twist:
Incorporate spices (like cinnamon or nutmeg) or extracts (like almond or mint) to elevate these classics.
Healthy Recipes for the Ninja Creami
Healthy Recipes
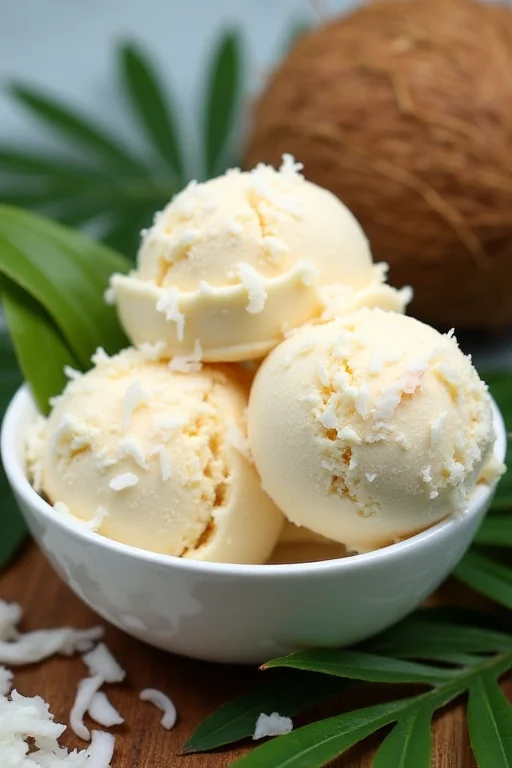
The Ninja Creami isn’t just for indulgent desserts it’s also perfect for creating healthier alternatives that align with your dietary goals. Whether you’re looking for dairy-free, low-carb, or sugar-free options, this section has you covered.
Dairy-Free Coconut Milk Ice Cream
Ingredients:
- 1 can (13.5 oz) full-fat coconut milk
- ¼ cup maple syrup or agave nectar
- 1 teaspoon vanilla extract
Instructions:
- Combine Ingredients:
In a bowl, mix the coconut milk, maple syrup, and vanilla extract until smooth. Ensure the sweetener is fully dissolved. - Freeze:
Pour the mixture into a Ninja Creami pint container, seal it, and freeze for at least 24 hours. - Process:
Insert the frozen base into the machine, select Ice Cream Mode, and process until creamy. - Serve:
Enjoy this naturally dairy-free treat as is, or add mix-ins like shredded coconut or chocolate chips using the Mix-In Mode.
Low-Carb Keto Ice Cream
Ingredients:
- 1 cup unsweetened almond milk
- 1 cup heavy cream
- ½ cup powdered erythritol or monk fruit sweetener
- ½ teaspoon vanilla extract
Instructions:
- Prepare the Mixture:
In a bowl, whisk together almond milk, heavy cream, erythritol, and vanilla extract until fully combined. - Freeze the Base:
Pour the base into the pint container and freeze for 24 hours. - Process and Add Mix-Ins:
Use the Ice Cream Mode to process the frozen base. For variety, fold in sugar-free chocolate chunks or chopped nuts using the Mix-In Mode. - Serve:
This creamy and low-carb dessert is perfect for keto enthusiasts.
Sugar-Free Strawberry Sorbet
Ingredients:
- 2 cups fresh or frozen strawberries
- 2 tablespoons powdered erythritol or stevia
- 1 teaspoon lemon juice
Instructions:
- Blend Ingredients:
In a blender, puree the strawberries, erythritol, and lemon juice until smooth. - Freeze the Mixture:
Pour the mixture into the Ninja Creami pint container and freeze for 24 hours. - Process:
Select Sorbet Mode to achieve a smooth, fruit-forward treat. - Serve:
Enjoy this naturally sweet and refreshing dessert without added sugars.
Protein-Packed Chocolate Ice Cream
Ingredients:
- 1 cup unsweetened almond milk
- 1 scoop chocolate protein powder
- 2 tablespoons unsweetened cocoa powder
- 1 tablespoon peanut butter (optional)
Instructions:
- Prepare the Base:
Mix almond milk, protein powder, cocoa powder, and peanut butter in a blender until smooth. - Freeze:
Transfer the mixture to the pint container and freeze for at least 24 hours. - Process:
Select the Ice Cream Mode for a creamy, protein-packed treat that doubles as a post-workout snack.
Banana Nice Cream
Ingredients:
- 3 ripe bananas, sliced and frozen
- 1 tablespoon almond or peanut butter
- 1 teaspoon cinnamon (optional)
Instructions:
- Prepare the Base:
Place frozen banana slices into the Ninja Creami pint container along with almond butter and cinnamon. - Freeze:
If using fresh bananas, freeze the pint container for 24 hours before processing. - Process:
Select Ice Cream Mode, and watch the frozen bananas transform into a creamy, guilt-free dessert. - Serve:
Add toppings like chopped nuts or coconut flakes for extra texture.
Tips for Making Healthier Desserts
- Use Natural Sweeteners:
Opt for honey, maple syrup, or stevia to reduce refined sugar intake. - Choose Whole Ingredients:
Incorporate fresh fruits, nuts, and plant-based milks for nutrient-dense recipes. - Control the Fat Content:
Substitute heavy cream with lighter options like Greek yogurt or low-fat coconut milk when possible.
Unique and Gourmet Flavors for the Ninja Creami
Unique and Gourmet Flavors
If you’re ready to move beyond the classics and explore inventive combinations, the Ninja Creami offers endless possibilities for unique and luxurious flavors. Impress guests or treat yourself to elevated recipes that blend creativity with decadence.
Matcha Green Tea Ice Cream
Ingredients:
- 1 cup whole milk
- 1 cup heavy cream
- ½ cup granulated sugar
- 1 tablespoon matcha green tea powder
Instructions:
- Prepare the Base:
In a bowl, whisk together the milk, cream, sugar, and matcha powder until the sugar is fully dissolved and the mixture is smooth. - Freeze:
Pour the mixture into the Ninja Creami pint container and freeze for at least 24 hours. - Process:
Select Gelato Mode for a denser, creamier texture that complements the earthy flavor of matcha. - Serve:
Garnish with a sprinkle of matcha powder or a drizzle of sweetened condensed milk for an elegant touch.
Salted Caramel Gelato
Ingredients:
- 1 cup whole milk
- 1 cup heavy cream
- ½ cup caramel sauce
- ½ teaspoon sea salt
Instructions:
- Mix the Ingredients:
Combine milk, cream, caramel sauce, and sea salt in a mixing bowl. Stir until the caramel is fully incorporated. - Freeze:
Transfer the mixture to the Ninja Creami pint container and freeze for 24 hours. - Process:
Use the Gelato Mode for a rich, creamy texture. For added indulgence, fold in caramel chunks using the Mix-In Mode. - Serve:
Top with crushed pretzels or a drizzle of caramel sauce for a sweet-and-savory flavor profile.
Looking for other easy and creative cooking ideas? Discover thin-sliced chicken recipes for quick, versatile meals.
Lavender Honey Sorbet
Ingredients:
- 2 cups water
- ½ cup honey
- 1 teaspoon dried culinary lavender
- 2 tablespoons lemon juice
Instructions:
- Infuse the Lavender:
In a saucepan, heat the water and honey together until the honey dissolves. Add the lavender and simmer for 2 minutes. Let the mixture cool, then strain out the lavender. Stir in the lemon juice. - Freeze:
Pour the mixture into the Ninja Creami pint container and freeze for 24 hours. - Process:
Use Sorbet Mode to achieve a smooth, aromatic treat. - Serve:
Garnish with edible flowers or a lemon slice for a visually stunning presentation.
Chocolate Espresso Ice Cream
Ingredients:
- 1 cup whole milk
- 1 cup heavy cream
- ½ cup granulated sugar
- 2 tablespoons unsweetened cocoa powder
- 1 shot of espresso, cooled
Instructions:
- Mix the Ingredients:
Combine the milk, cream, sugar, cocoa powder, and espresso in a bowl. Whisk until smooth. - Freeze:
Pour the base into the Ninja Creami pint container and freeze overnight. - Process:
Select Ice Cream Mode for a creamy, coffee-infused dessert. Add mini chocolate chips using the Mix-In Mode for extra texture. - Serve:
Top with whipped cream and a dusting of cocoa powder for a café-inspired dessert.
Blueberry Cheesecake Ice Cream
Ingredients:
- 1 cup whole milk
- 1 cup heavy cream
- ½ cup granulated sugar
- 2 tablespoons cream cheese, softened
- ½ cup blueberry compote or jam
Instructions:
- Prepare the Base:
Blend the milk, cream, sugar, and cream cheese until smooth. Swirl in the blueberry compote. - Freeze:
Pour the mixture into the pint container and freeze for at least 24 hours. - Process and Add Mix-Ins:
Process on Ice Cream Mode, then fold in graham cracker crumbles using the Mix-In Mode. - Serve:
Garnish with fresh blueberries for a vibrant and flavorful dessert.
For more ways to prepare protein-rich meals, check out chicken breakfast ideas.
Tips for Crafting Gourmet Flavors
- Layer Ingredients for Depth:
Use syrups, sauces, or purees to create ribbons of flavor throughout your ice cream. - Experiment with Spices and Extracts:
Add spices like cardamom, anise, or ginger for an exotic twist. - Balance Sweetness with Savory Notes:
Incorporate ingredients like sea salt, rosemary, or balsamic reduction for unique flavor pairings.
With these gourmet recipes, you can elevate your Ninja Creami creations to a whole new level of sophistication. Whether you’re serving guests or treating yourself, these unique flavors are sure to impress.
Pair your ice cream with an indulgent treat like an almond cake for a complete dessert experience.
Additional Insights About the Ninja Creami
What else can you do with a Ninja Creami?
The Ninja Creami is incredibly versatile and can create more than just ice cream. Some creative uses include:
- Milkshakes and Smoothies
The machine can blend frozen bases into rich milkshakes or smoothie bowls. Add your favorite fruits, yogurt, or protein powders for a healthy treat. - Sorbet and Gelato
Create refreshing sorbets with fresh fruit or decadent gelatos with dense and creamy textures. - Frozen Yogurt
Use Greek yogurt or regular yogurt to craft tangy and healthier alternatives to traditional ice cream. - Frozen Cocktails
Blend your favorite cocktails, like margaritas or piña coladas, for a boozy frozen treat. - Dessert Bowls
The Creami can transform fruits, pudding, or other bases into creative dessert bowls with mix-ins like nuts or cookie crumbles. - Baby Food and Healthier Options
The appliance is also excellent for making pureed, nutrient-rich baby food or dietary-friendly frozen desserts.
Do you really have to wait 24 hours for the Ninja Creami?
Yes, the 24-hour freeze time is crucial for optimal results. Here’s why:
- Fully Frozen Base: The machine works by shaving and churning an already-solid frozen base. If the mixture isn’t completely frozen, the texture may turn out too soft or uneven.
- Temperature Consistency: Freezing the base ensures it reaches the proper temperature for the machine’s blades to process effectively.
Tip: To save time in the future, prepare and freeze multiple pint containers in advance, so you always have a ready-to-use base.
Was the Ninja Creami discontinued?
No, the Ninja Creami has not been discontinued. As of 2024, it remains a popular product in Ninja’s appliance lineup. However, due to its high demand and popularity, it may occasionally sell out or be unavailable in certain regions. Check Ninja’s official website or authorized retailers for the latest availability.
Why use pudding mix in the Ninja Creami?
Adding pudding mix to your Ninja Creami recipes can enhance both flavor and texture. Here’s how:
- Creamy Texture: Pudding mix contains thickeners like cornstarch and gelatin, which help create a smooth and creamy consistency in frozen desserts.
- Enhanced Flavor: Pudding mixes come in a variety of flavors (chocolate, vanilla, butterscotch) that can easily elevate the taste of your ice cream.
- Stabilizing Effect: The ingredients in pudding mix help prevent iciness and graininess, ensuring a velvety result.
How to Use It: Simply whisk a small amount of pudding mix into your base mixture before freezing. Adjust sweetness to your preference, as some pudding mixes are pre-sweetened.
Conclusion
The Ninja Creami has revolutionized the way we enjoy frozen desserts at home, making it easier than ever to create ice cream, sorbets, gelatos, and so much more. With its user-friendly design and versatile capabilities, the Ninja Creami empowers you to experiment with flavors, dietary preferences, and creative ideas that fit your lifestyle. Whether you’re crafting a classic vanilla ice cream, a health-conscious sorbet, or a gourmet salted caramel gelato, this appliance guarantees smooth and satisfying results every time.
What makes the Ninja Creami stand out is its ability to cater to everyone from families looking for kid-friendly treats to health enthusiasts seeking low-carb or dairy-free options. With endless possibilities for toppings, mix-ins, and customizations, you’re only limited by your imagination.
While the 24-hour freeze time may require some planning, the payoff is well worth it when you scoop into your homemade creation. Its versatility doesn’t stop at desserts milkshakes, smoothie bowls, and even frozen cocktails are within reach, making it an indispensable tool in any kitchen.
Whether you’re a seasoned pro or new to frozen dessert-making, the Ninja Creami delivers consistency, creativity, and pure indulgence. Take the plunge, try out the recipes and tips shared here, and discover why so many people rave about this game-changing appliance. The possibilities are truly endless!
Ready to try these Ninja Creami recipes? Let your creativity shine in the kitchen!
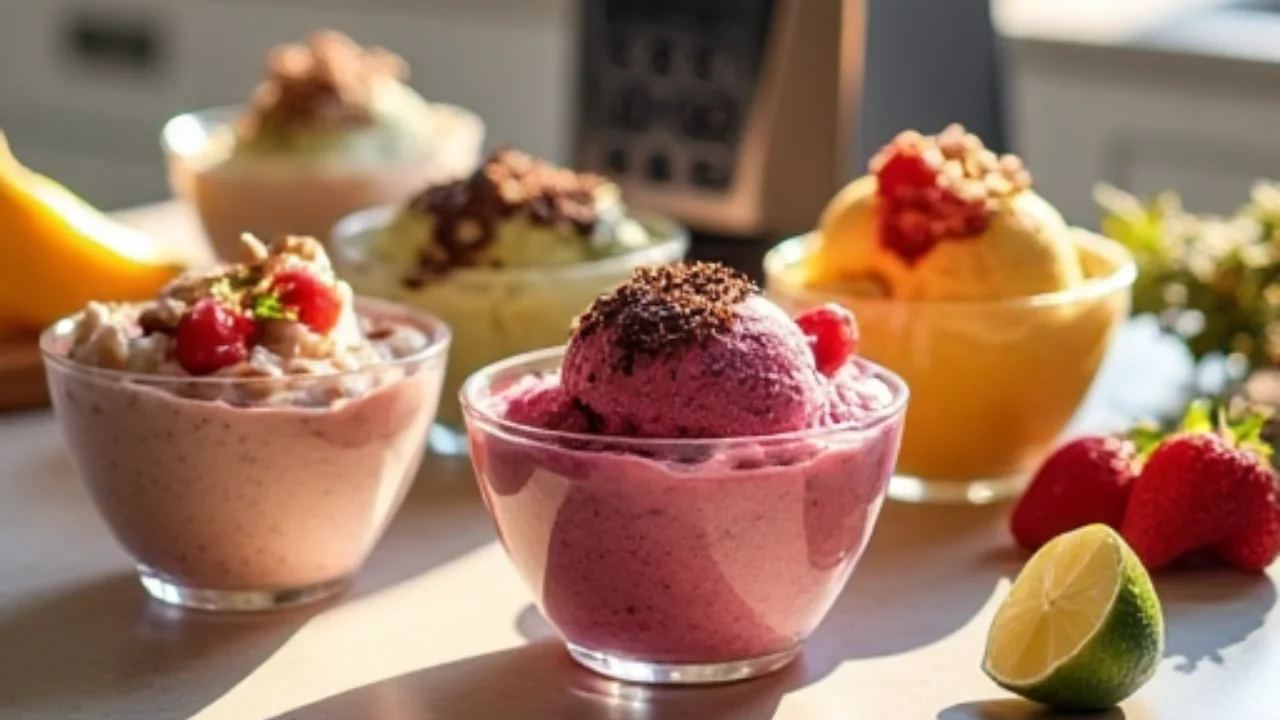
Ninja Creami Recipe: Strawberry Cheesecake Ice Cream
Equipment
- Ninja Creami Machine
- Ninja Creami Pint Container & Lid
- Blender or food processor
- Measuring cups/spoons
- Mixing bowl
- Spatula
Ingredients
- 1 cup fresh strawberries hulled and chopped
- 4 oz cream cheese softened
- 1 cup whole milk
- ½ cup heavy cream
- ⅓ cup granulated sugar
- 1 tsp vanilla extract
- ½ tsp lemon juice
- 2 tbsp graham cracker crumbs optional, for mix-in
Instructions
- Step 1: Prepare the Base
- In a blender, combine strawberries, cream cheese, whole milk, heavy cream, sugar, vanilla extract, and lemon juice.
- Blend until smooth and fully combined.
- Step 2: Freeze the Base
- Pour the mixture into a Ninja Creami pint container and close with the lid.
- Place the container upright in the freezer and freeze for at least 24 hours until completely solid.
- Step 3: Process in Ninja Creami
- Remove the frozen pint from the freezer and install it into the Ninja Creami machine.
- Select the “Ice Cream” function and let it spin.
- Step 4: Add Mix-Ins (Optional)
- If you want a cheesecake crust texture, add graham cracker crumbs into the pint.
- Use the “Mix-In” function to evenly distribute the crumbs.
- Step 5: Serve & Enjoy
- Scoop into bowls or cones and enjoy your homemade Strawberry Cheesecake Ice Cream!
- Details
- Prep Time: 10 minutes
- Time Cook: 0 minutes
- Time Total: 24 hours (including freezing)
- Yield: 1 pint (about 2 servings)
- Category: Dessert
- Method: Freezing & Blending
- Cuisine: American
- Diet: Vegetarian
- Keywords
- Ninja Creami, Ice Cream, Strawberry, Cheesecake, Homemade Ice Cream, Summer Desserts, Frozen Treats, Creamy, Easy Ice Cream Recipe
- Nutrition (Per Serving, Approximate)
- Serving Size: ½ pint
- Calories: 280
- Sugar: 24g
- Sodium: 90mg
- Fat: 16g
- Saturated Fat: 10g
- Unsaturated Fat: 5g
- Trans Fat: 0g
- Carbohydrates: 30g
- Fiber: 1g
- Protein: 4g
- Cholesterol: 50mg
Notes
If you prefer a lower sugar option, substitute sugar with monk fruit sweetener or erythritol.
For a smoother texture, re-spin the ice cream if it appears crumbly after the first cycle.
This recipe works great with almond milk or coconut milk for a dairy-free version, though the texture may be less creamy.
