
Crème brûlée is a dessert that captivates with its creamy base and signature caramelized sugar topping. But how do you achieve that perfect crust? In this guide, you’ll learn how to caramelize brûlée step by step, ensuring a flawless finish every time.
Table of Contents
What Makes Crème Brûlée Special?
Crème brûlée, translating to “burnt cream” in French, is a luxurious dessert that combines a rich custard base with a caramelized sugar topping. The dish’s origins are often debated, but it has been a staple in French cuisine since the 17th century. Known for its creamy vanilla-infused filling and crisp, crackable caramel crust, crème brûlée is a favorite among dessert enthusiasts worldwide.
The custard base typically consists of heavy cream, egg yolks, sugar, and vanilla, baked to a silky texture. The final flourish caramelizing sugar on top elevates the dessert with a satisfying contrast of textures. Whether served at high-end restaurants or made at home, crème brûlée epitomizes culinary elegance.
The highlight of crème brûlée is its caramel topping. Knowing how to caramelize brûlée properly is key to balancing the creamy custard with the crisp sugar crust.
Essential Tools for How to Caramelize Brûlée
A kitchen torch is the most efficient tool for learning how to caramelize brûlée. However, alternatives like an oven broiler can also help create the perfect caramel layer.
Kitchen Torch
A kitchen torch is the most common tool for caramelizing crème brûlée. It allows precise control over the heat and ensures even caramelization. The flame is directed at the sugar until it melts and browns, creating a perfectly crisp crust.
Oven Broiler
If you don’t have a kitchen torch, your oven broiler is a viable alternative. This method uses the intense heat from the broiler to caramelize the sugar. While less precise, it can still produce excellent results.
Sugar Types
The type of sugar you use matters. Granulated sugar is the standard choice because it melts and caramelizes evenly. However, raw sugar or specialty sugars like demerara can add unique flavors and textures.
you might find creative inspiration in the Easy Homemade Hotcake Mix Recipe for other versatile techniques.
Step-by-Step Process for Caramelizing Brûlée
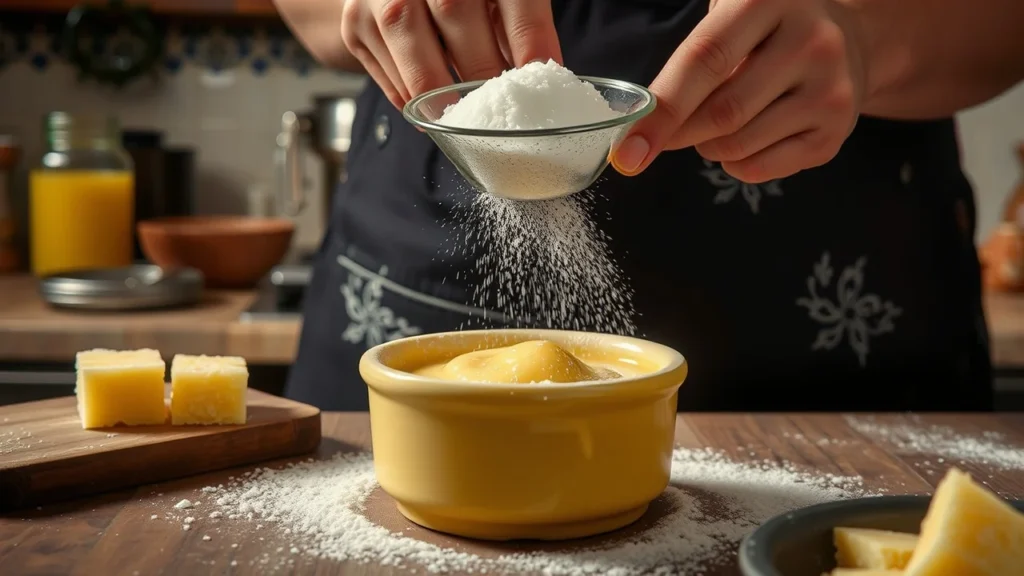
Learning how to caramelize brûlée starts with preparing the custard. After chilling, a uniform sugar layer is added before caramelizing. A kitchen torch makes it easy to master this process.
Step 1: Prepare the Custard
Start by preparing your crème brûlée custard base. After baking and cooling the custard, it should be chilled thoroughly. The custard must be cold before you caramelize the sugar, as this prevents the heat from altering its texture.
How to Prepare Crème Brûlée for Caramelization
Evenly sprinkle a thin layer of sugar over the top of the custard. The layer should be uniform to ensure consistent caramelization. Avoid using too much sugar, as this can lead to an overly thick and sticky crust.
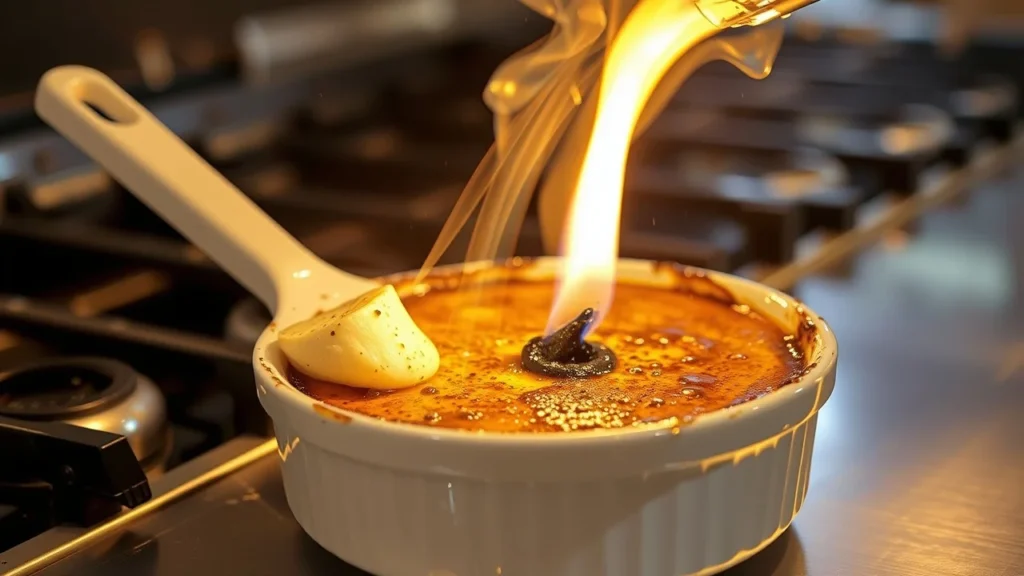
Caramelizing Brûlée with a Kitchen Torch: Step-by-Step
Turn on your kitchen torch and hold it a few inches away from the sugar. Move the flame in small, circular motions until the sugar melts and turns golden brown. Take care not to linger too long in one spot to avoid burning the sugar.
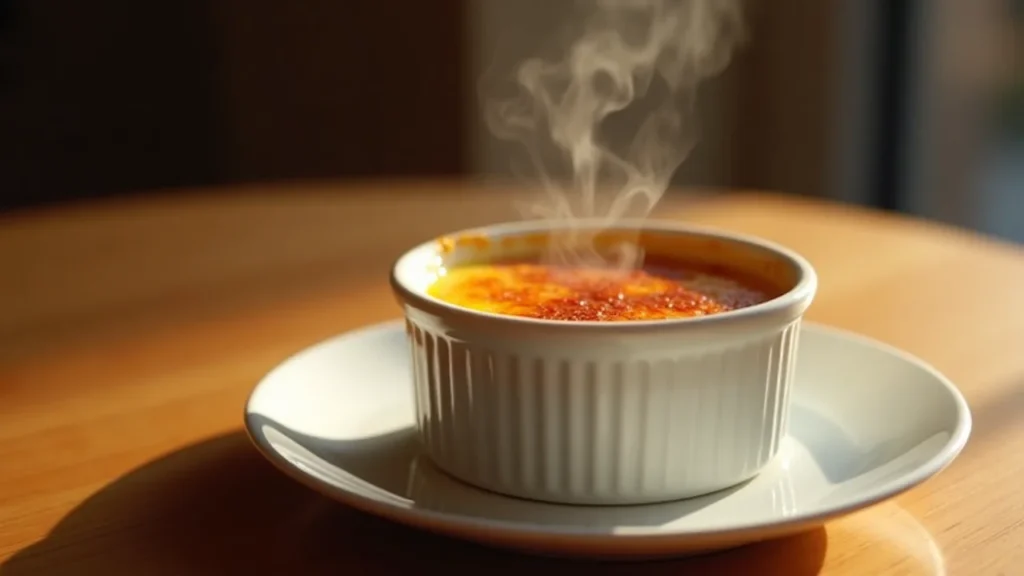
Step 4: Cool Slightly
Allow the caramelized sugar to cool for a minute or two. This cooling process hardens the sugar into a crisp, glass-like layer that shatters delightfully when tapped with a spoon.
Alternative Methods for Caramelizing Crème Brûlée
If you don’t have access to a kitchen torch, there are alternative methods for caramelizing crème brûlée. While these may not offer the same precision, they can still produce a deliciously crisp sugar topping.
Using an Oven Broiler to Caramelize Brûlée
The broiler in your oven is a practical alternative to a torch. Here’s how to use it:
- Position the Racks: Place the crème brûlée dishes on the top rack of your oven, ensuring they are close to the broiler element.
- Preheat the Broiler: Set your oven to broil and allow it to preheat for a few minutes.
- Sprinkle Sugar Evenly: Add a uniform layer of sugar on top of the chilled custards.
- Caramelize the Sugar: Place the dishes under the broiler, keeping a close eye on them. The sugar will begin to melt and brown within 2–5 minutes. Rotate the dishes if needed for even caramelization.
Tip: Be cautious, as the broiler’s intense heat can quickly burn the sugar if left unattended.
Using a Metal Spoon
For a more unconventional approach, heat a metal spoon over an open flame until it’s very hot. Then press the spoon gently onto the sugar layer. The heat will caramelize the sugar, though this method requires patience and may result in uneven caramelization.
Tips for Perfect Brûlée Caramelization
If you’re wondering how to caramelize brûlée like a pro, remember these tips: use a thin sugar layer, keep the torch moving, and allow the caramel to cool for that signature crunch.
Expert Tips for Caramelizing Crème Brûlée Like a Pro
Opt for fine granulated sugar, as it melts evenly and quickly. If you prefer a deeper flavor, experiment with raw or demerara sugar, but be mindful that it may take longer to caramelize.
Chill the Custard
Ensure the custard is thoroughly chilled before adding the sugar. This prevents the heat from the caramelization process from softening or warming the custard.
Keep the Torch Moving
If using a kitchen torch, keep the flame in constant motion to avoid burning the sugar. Focus on even caramelization by working in small, circular motions across the surface.
Avoiding Mistakes When Learning How to Caramelize Brûlée
A thin, even layer of sugar is key. Too much sugar can result in a thick, sticky crust that overwhelms the custard.
Let It Cool
Once caramelized, let the brûlée sit for a minute or two. This allows the sugar to harden, creating the classic crunch when cracked.
Common Mistakes to Avoid
Even seasoned chefs can encounter challenges when caramelizing crème brûlée. Avoid these common pitfalls to perfect your technique:
Overheating
Directing too much heat in one spot can burn the sugar and create a bitter taste. Always keep the heat source moving to ensure even caramelization.
Uneven Sugar Layer
An inconsistent sugar layer can lead to patches of burnt or undercaramelized sugar. Use a spoon to distribute the sugar evenly before caramelizing.
Under Caramelizing
Stopping the process too soon can result in a sugar layer that’s more granular than glassy. Aim for a golden brown color that indicates the sugar has fully melted and caramelized.
If you’re experimenting with other custard desserts, such as cheesecake, try incorporating ideas from the Best Cherry Cheesecake Recipe: Easy Step-by-Step Guide for complementary flavor profiles.
The Science of Caramelization
Understanding the science behind caramelization can help you refine your technique and achieve consistent results. When sugar is exposed to high heat, it undergoes a chemical transformation known as the Maillard reaction. This reaction breaks down sugar molecules, causing them to brown and release complex flavors.
The Role of Heat
Caramelization occurs when sugar is heated to a temperature of around 340°F (170°C). At this point, the sugar begins to melt, transforming from solid granules into a liquid that gradually darkens. The longer the sugar is heated, the more its flavors develop, ranging from sweet and mild to nutty and slightly bitter.
Balancing Flavor and Texture
For crème brûlée, the goal is to achieve a topping that is thin, crisp, and richly flavored without crossing into bitterness. The process is delicate too little heat and the sugar won’t fully caramelize; too much heat and it may burn.
Why Cooling is Crucial
After caramelizing the sugar, allowing it to cool is essential. During this cooling period, the melted sugar solidifies into a brittle layer that provides the dessert’s iconic “crack” when tapped with a spoon.
Choosing the Right Sugar
The type of sugar you choose plays a crucial role in the caramelization process. Each variety has unique properties that affect the flavor, texture, and appearance of your brûlée.
Granulated Sugar
Standard granulated sugar is the go-to choice for most recipes. Its fine crystals melt evenly, creating a smooth caramelized layer. It also has a neutral flavor, allowing the custard’s vanilla and cream notes to shine.
Raw or Demerara Sugar
For a more robust flavor, raw sugars like demerara or turbinado are excellent options. These sugars have larger crystals and a slight molasses taste, adding depth to the brûlée. However, their higher moisture content may require additional time to caramelize fully.
Specialty Sugars
Other options, such as coconut sugar or muscovado, can impart unique flavors but may behave differently under high heat. Experimenting with these can add variety to your dessert repertoire.
Avoid Powdered Sugar
Powdered sugar is not recommended for caramelizing crème brûlée, as it contains cornstarch, which can inhibit proper melting and caramelization.
Achieving the Perfect Crunch
The hallmark of a well-made crème brûlée is its thin, crisp caramel layer. Striking the right balance between thickness and crunchiness enhances the dessert’s overall experience.
Use a Thin Sugar Layer
A thin, evenly spread sugar layer is crucial. This ensures the sugar melts quickly and evenly, forming a delicate crust. Too much sugar can lead to a thick, overly sticky topping.
Timing is Key
Caramelize the sugar just before serving. If the brûlée sits for too long, moisture from the custard can seep into the sugar, softening the crust and diminishing its crunch.
Uniform Caramelization
To create a consistent layer, work systematically with your torch or broiler. Move the heat source evenly across the surface, ensuring no spots are left untouched.
Pair your brûlée skills with recipes like Ultimate Ninja Creami Recipes for Delicious Homemade Ice Cream to craft a full dessert menu.
Serving and Storing Tips
Proper serving and storage are essential to maintain the integrity of the caramelized layer and the custard beneath. Here are some guidelines to ensure your crème brûlée remains delectable from preparation to presentation.
Serving Crème Brûlée
Crème brûlée is best served immediately after caramelizing the sugar. This preserves the contrast between the crisp caramel layer and the creamy custard. Serve it chilled for a refreshing dessert experience.
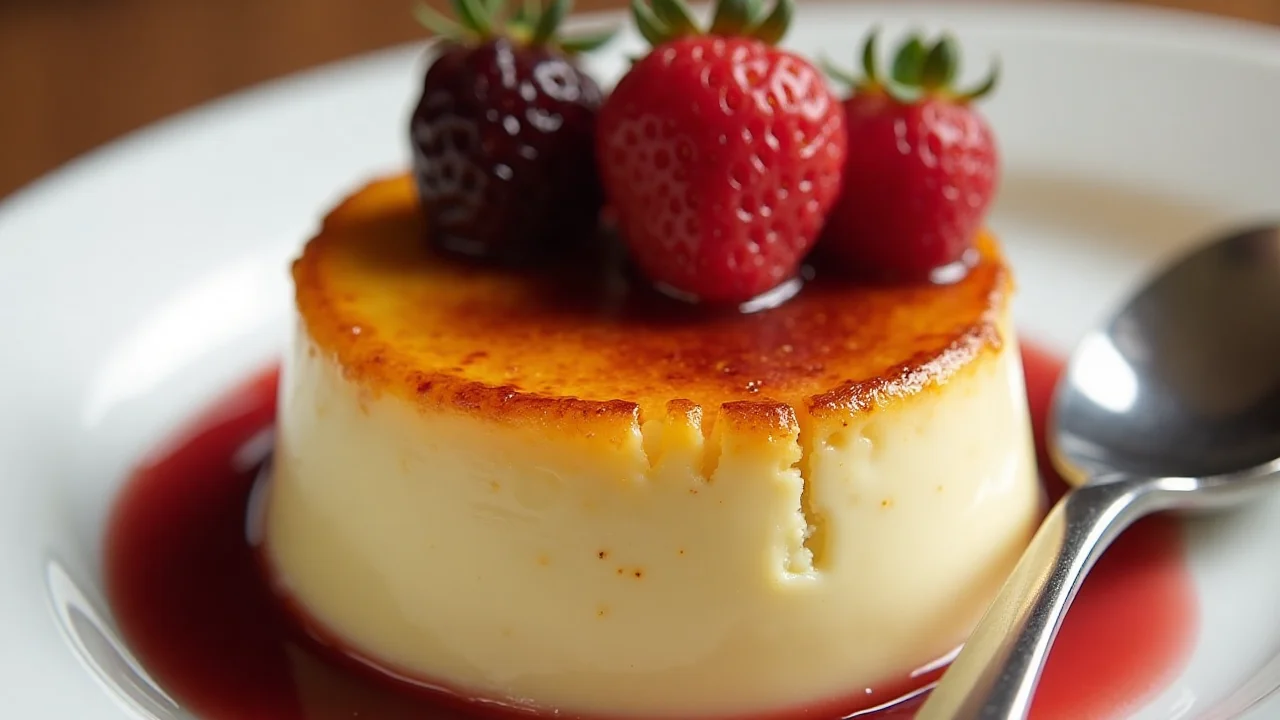
Presentation Tips:
- Use small ramekins for individual servings to enhance the visual appeal.
- Add a garnish of fresh fruit, such as raspberries or strawberries, for a pop of color and acidity that complements the sweetness.
- Pair with a dessert wine, such as Sauternes or Moscato, for a luxurious dining experience.
Storing Leftovers
If you must store crème brûlée, take steps to protect the caramelized layer and custard.
- Uncaramelized Storage: If you’ve only prepared the custard, cover the ramekins with plastic wrap and refrigerate for up to 3 days. Caramelize the sugar just before serving.
- Caramelized Storage: While not ideal, already caramelized crème brûlée can be stored briefly. Cover it lightly with plastic wrap and refrigerate for up to 24 hours. Be aware that the sugar topping may soften.
Recrisping the Sugar
To restore the crunch after storing, add a small amount of sugar and re-caramelize using a torch or broiler. This technique can help revitalize the dessert before serving.
Frequently Asked Questions About Caramelizing Brûlée
Can I caramelize crème brûlée without a torch?
Yes, knowing how to caramelize brûlée with a broiler is a great alternative. Just watch closely to avoid burning the sugar.
Why is my sugar layer sticky?
A sticky sugar layer often results from using too much sugar or caramelizing it unevenly. Aim for a thin, uniform layer and ensure complete caramelization.
How can I avoid burning the sugar?
Keep your heat source moving and maintain a safe distance from the sugar. Watch closely during caramelization to prevent burning.
What is the best ramekin size for crème brûlée?
Shallow, wide ramekins are ideal, as they allow for a higher ratio of caramelized sugar to custard. A depth of about 1 inch is recommended.
Can I make crème brûlée in advance?
Yes, the custard can be prepared and chilled up to 3 days in advance. Caramelize the sugar layer just before serving for the best texture.
Why is my caramelized layer not cracking?
If the caramelized sugar is too thick, it may become chewy rather than brittle. Use a thin sugar layer and allow it to cool completely before serving.
Pair your brûlée with a bold flavor contrast by drawing inspiration from savory dishes like this Chipotle Steak Recipe: Your Ultimate Guide to Smoky Perfection.
Conclusion
Mastering the art of caramelizing crème brûlée is an achievable and rewarding culinary skill. By understanding the process, using the right tools, and following expert tips, you can create a dessert that impresses with its creamy custard and crisp caramel topping. Whether you’re entertaining guests or treating yourself, crème brûlée offers a delightful blend of textures and flavors that never fails to satisfy.
Are you ready to experiment with this classic dessert? Grab your kitchen torch and ramekins, and enjoy the sweet satisfaction of cracking into your very own homemade crème brûlée!
consider impressing your guests further with themed desserts like the Dubai Chocolate Bar Recipe to round out your repertoire.🥰
Caramelize Brûlée
Equipment
- Oven: Preheated to 325°F (163°C)
- Ramekins: 6 small, oven-safe dishes (approximately 4–6 oz each)
- Baking Dish or Roasting Pan: Large enough to hold the ramekins for a water bath
- Mixing Bowls: For blending ingredients
- Whisk: For smooth emulsification of yolks and sugar
- Small Saucepan: For heating the cream and infusing flavors
- Fine-Mesh Strainer: To ensure an ultra-smooth custard texture
- Kitchen Torch: For caramelizing the sugar topping (alternatively, use your oven’s broiler)
- Measuring Cups & Spoons: For accurate ingredient portions.
Ingredients
- For the Custard
- 2 cups heavy cream
- 1 vanilla bean split lengthwise and seeds scraped out
- Alternatively, 1 teaspoon pure vanilla extract
- 5 large egg yolks
- ½ cup granulated sugar divided; see note below
- A pinch of salt
- For the Caramelized Topping
- 4 –6 tablespoons granulated sugar spread evenly over the custard tops
- Optional: mix in 2 tablespoons water with the sugar for an even melt if desired
Instructions
- Preheat & Prep:
- Preheat your oven to 325°F (163°C).
- Place your ramekins in a large baking dish or roasting pan that will later accommodate a water bath.
- Infuse the Cream:
- In a small saucepan, combine the heavy cream and the split vanilla bean (including the seeds).
- Gently heat the mixture over medium heat until it just begins to simmer (do not let it boil). Remove from heat and allow to steep for 10 minutes to fully infuse the vanilla flavor.
- Whisk the Yolks:
- In a medium mixing bowl, whisk together the egg yolks, ¼ cup of the granulated sugar (set aside the remaining sugar for the topping), and a pinch of salt until the mixture becomes pale and slightly thickened.
- Temper the Custard:
- Slowly pour about ½ cup of the warm cream into the yolk mixture while whisking continuously. This gradual addition prevents the eggs from cooking too quickly.
- Once combined, slowly pour the tempered egg mixture back into the saucepan with the remaining cream. (If using vanilla extract instead of a bean, add it at this stage.)
- Strain the mixture through a fine-mesh sieve into a clean bowl to ensure a silky texture free of any cooked egg bits.
- Fill the Ramekins:
- Evenly distribute the custard mixture among the ramekins.
- Place the filled ramekins into the baking dish and carefully pour hot water into the dish until it reaches about halfway up the sides of the ramekins (this water bath, or “bain-marie,” ensures gentle and even cooking).
- Bake the Custards:
- Place the water-bath setup in the preheated oven.
- Bake for approximately 35–40 minutes, or until the custards are set around the edges yet still have a slight wobble in the center.
- Remove the ramekins from the water bath and allow them to cool to room temperature.
- Chill:
- Cover the ramekins with plastic wrap and refrigerate for at least 2 hours (or up to overnight) to fully set and develop flavor.
- Caramelize the Sugar:
- When ready to serve, remove the custards from the refrigerator.
- Evenly sprinkle 1 teaspoon (or to taste) of granulated sugar over the surface of each custard.
- Using a kitchen torch, carefully melt and caramelize the sugar by moving the flame steadily across the surface until the sugar melts into a deep amber, hard-crisp shell.
- Alternative: Place the ramekins under a very hot broiler for 2–3 minutes. Watch closely to prevent burning.
- Serve:
- Allow the caramelized topping to cool for about 1 minute so it hardens completely.
- Serve immediately and enjoy the satisfying crack of the caramel crust with each spoonful.
- Details
- Prep Time: 20 minutes (plus additional time for cooling and chilling)
- Cook Time: 35–40 minutes
- Total Time: Approximately 2 hours and 1 minute (including at least 2 hours of chilling)
- Yield: 6 servings
- Category: Dessert
- Method: Baking (custard) and Caramelizing (sugar topping)
- Cuisine: French-inspired (with a modern twist)
- Diet: Gluten-Free, Vegetarian
- Keywords
- Custard
- Caramel
- Crème Brûlée
- French Dessert
- Silky
- Decadent
- Elegant
- Caramelized
- Nutrition (Approximate per Serving)
- Serving Size: ~150 grams
- Calories: 300 kcal
- Sugar: 25 g
- Sodium: 80 mg
- Fat: 20 g
- Saturated Fat: 12 g
- Unsaturated Fat: 8 g
- Trans Fat: 0 g
- Carbohydrates: 30 g
- Fiber: 0 g
- Protein: 5 g
- Cholesterol: 150 mg
- Note: Nutritional values are estimates and can vary based on ingredient brands and portion sizes.
Notes
Caramelizing Without a Torch: If you don’t have a kitchen torch, use your oven’s broiler. Place the ramekins on a baking sheet and broil on the highest setting for 2–3 minutes. Keep a very close eye on them to avoid burning the sugar.
Serving Tip: For the ultimate experience, serve the dessert immediately after caramelizing the topping to maintain the perfect contrast between the crisp top and the cool, creamy custard beneath.
Storage: Leftover custard (without the caramelized top) can be covered and stored in the refrigerator for up to 2 days. However, the caramelized sugar topping should be prepared just before serving for optimal texture.