

Brining is a time-tested technique that enhances the flavor and moisture of chicken, keeping it juicy and tender. It involves soaking or coating the meat in a salt-based solution or dry mixture, allowing flavors to penetrate deeply through osmosis. This method is especially useful for preventing dryness during cooking. In this guide, we’ll break down the science behind brining, key ingredients, step-by-step instructions, common mistakes to avoid, and delicious recipes to try helping you perfect this essential culinary skill.
Table of Contents
Understanding Brining
What is Brining Chicken and Why Does it Work?
Brining is a culinary process that involves soaking or coating meat, particularly chicken, in a mixture of salt, water, and optional flavorings. This technique is used to enhance the meat’s moisture and flavor. The process isn’t new brining has been a staple in preserving and seasoning meats for centuries. What makes brining special is how it transforms chicken from potentially dry and bland to tender, juicy, and bursting with flavor.
The Science Behind Brining
The magic of brining lies in two scientific processes: osmosis and diffusion.
- Osmosis: Salt in the brine draws out some of the chicken’s natural moisture initially, but as the process continues, the chicken reabsorbs the liquid, now infused with salt and any added flavors.
- Diffusion: Once the salt enters the chicken, it begins breaking down the proteins. This restructuring traps more moisture inside the meat fibers, preventing it from drying out during cooking.
The result? A chicken that remains moist even after being roasted, grilled, or fried.
Types of Brining: Wet vs. Dry Brine

- Wet Brine:
A wet brine involves dissolving salt in water to create a liquid solution. The chicken is fully submerged in this mixture for a designated time. This method is great for whole chickens or larger cuts of meat.- Advantages: Deep moisture infusion and more even seasoning.
- Drawbacks: Requires more space (a large container) and can be messy.
- Dry Brine:
A dry brine uses salt and seasonings rubbed directly onto the chicken’s surface without any added water. This method is efficient and works well for smaller cuts like breasts or thighs.- Advantages: Easier to execute and requires less equipment.
- Drawbacks: Slightly less moisture retention compared to wet brining.
By understanding the science and methods of brining, you can choose the technique that best suits your dish and available time. Both wet and dry brines have their merits, and mastering either will elevate your chicken dishes.
Benefits of Brining Chicken for Juicy Meat
Brining is a simple yet transformative technique that offers numerous benefits for chicken preparation. From flavor enhancement to improved cooking results, here’s why brining should be a staple in your kitchen routine.
1. Enhanced Flavor Infusion
The primary benefit of brining is its ability to infuse chicken with deep, well-balanced flavors.
- Salt: Acts as a flavor amplifier, drawing out the natural taste of the chicken while seasoning it internally.
- Additional Ingredients: When herbs, spices, or sweeteners are added to the brine, they permeate the chicken, providing layers of complex flavors. For example, adding garlic, rosemary, or brown sugar can yield a savory, slightly sweet profile.
Unlike surface seasoning that can burn off or remain on the exterior, brining ensures the flavor penetrates all the way through the meat.
2. Improved Texture and Moisture Retention
Cooking chicken, especially lean cuts like breasts, often results in dryness due to moisture loss at high heat. Brining combats this issue:
- The salt in the brine restructures the proteins in the chicken, enabling them to retain more water.
- This retained moisture prevents the chicken from drying out during grilling, roasting, or frying.
The result? Tender, juicy meat that remains succulent regardless of the cooking method.
3. Versatility for Different Recipes
Brining isn’t just for one type of dish it’s incredibly versatile and can adapt to various cooking styles:
- Grilling: Brined chicken grills beautifully, staying juicy even over high heat.
- Roasting: The brine enhances the meat’s flavor while ensuring it remains moist throughout the slow cooking process.
- Frying: Brining helps fried chicken develop a flavorful crust without losing its moisture inside.
Moreover, both wet and dry brines can be tailored to suit different cuisines. Add soy sauce, ginger, and star anise for an Asian-inspired dish or opt for lemon, thyme, and garlic for a Mediterranean touch.
4. Improved Browning and Crispiness
Brining helps achieve better browning and crispiness during cooking.
- The salt breaks down surface proteins, allowing for more effective Maillard reactions (the chemical process responsible for browning).
- For dry-brined chicken, the exterior crisps up beautifully, making it perfect for roasted or fried dishes.
5. Reduced Risk of Undercooking or Overcooking
Because brined chicken retains moisture so well, it is more forgiving when it comes to cooking time. Even if the chicken cooks slightly longer than intended, it is less likely to become dry or tough. This makes brining an excellent choice for novice cooks or anyone experimenting with new recipes.
6. Customizable Results
One of the best aspects of brining is its flexibility:
- You can adjust the saltiness, sweetness, or spiciness of the brine to suit your taste preferences.
- Choose a short brine for mild flavor or a longer brine for more pronounced seasoning.
Conclusion of Benefits
In summary, brining chicken offers a perfect combination of enhanced flavor, juicy texture, and versatility. Whether you’re preparing a weekday dinner or hosting a special occasion, brining ensures your chicken stands out as the star of the meal.
The Perfect Brine Formula
Creating the perfect brine is a balance of science and creativity. The formula depends on the type of brine you’re using wet or dry and the results you’re aiming to achieve. Here’s a detailed guide to help you get it just right.
Basic Brine Ratio for Wet Brining
The foundation of any good wet brine is the salt-to-water ratio. This ratio ensures the chicken absorbs the right amount of seasoning without becoming overly salty.
- Standard Ratio:
- 1 cup of kosher salt per gallon (16 cups) of water.
- For smaller batches: ¼ cup of kosher salt per quart (4 cups) of water.
This ratio creates a roughly 5-6% salt solution, ideal for seasoning chicken without overwhelming its natural flavors.
Recipes Featuring Brined Chicken
For inspiration, explore these recipes on Cooked Joy:
- Brining Chicken Breast: The Ultimate Guide to Juicy, Flavorful Results – Perfect for lean cuts like chicken breasts.
- Costco Chicken Salad Recipe: Nutritional Facts and Serving Ideas – A great way to use leftover brined chicken.
- Thin-Sliced Chicken Recipes: 15 Delicious and Easy Meal Ideas – Perfect for weeknight dinners.
Adjustments for Additional Ingredients
- Sugar: Adding ½ to 1 cup of sugar per gallon of water complements the salt and balances the flavor. Sugar also helps the chicken caramelize beautifully during cooking.
- Aromatics: Add herbs, spices, and flavorings to the brine. Common choices include bay leaves, garlic cloves, peppercorns, citrus zest, and thyme. These infuse subtle yet distinct flavors into the chicken.
- Alternative Liquids: Replace part of the water with apple cider, beer, or stock to add a unique flavor profile.
The Formula for Dry Brining
Dry brining uses a different approach, relying on salt and seasonings directly applied to the chicken’s surface.
- Basic Dry Brine Ratio:
- Use 1 teaspoon of kosher salt per pound of chicken.
This ensures even seasoning without over-salting. The salt should be rubbed evenly across the chicken’s skin and meat, ensuring all surfaces are covered.
Adding Extra Flavor
- Combine the salt with spices, dried herbs, or even citrus zest for a flavorful rub.
- Popular combinations include smoked paprika, garlic powder, onion powder, and black pepper.
3. How Long to Brine
The brining duration depends on the size and type of chicken you’re preparing.
| Chicken Cut | Wet Brining Time | Dry Brining Time |
|---|---|---|
| Whole Chicken | 8-12 hours | 12-24 hours |
| Bone-In Thighs/Wings | 4-6 hours | 6-12 hours |
| Boneless Breasts | 1-2 hours | 2-4 hours |
| Chicken Drumsticks | 2-4 hours | 4-8 hours |
Tip: Avoid over-brining, as it can lead to overly salty or mushy chicken.
Temperature Matters
- Wet brine solutions should always be chilled to prevent bacterial growth. Ensure the brine is cold before submerging the chicken.
- If using warm water to dissolve salt and sugar, cool the mixture with ice before adding the chicken.
5. Using the Right Container
Choose a non-reactive container to avoid chemical reactions that may alter the flavor or safety of the chicken.
- Best Options: Plastic zip-top bags, glass bowls, or stainless-steel containers.
- Ensure the chicken is fully submerged in the brine or evenly coated if using a dry brine.
6. The Rinsing and Drying Step
Once the brining process is complete:
- Rinse the chicken thoroughly under cold water to remove excess salt and seasoning.
- Pat the chicken dry with paper towels. This step is essential for achieving crispy skin during cooking.
By following this brining formula, you’ll have a versatile and effective method for elevating your chicken dishes. The balance of salt, seasonings, and timing is key to achieving the perfect result.
Step-by-Step Guide to Brining Chicken
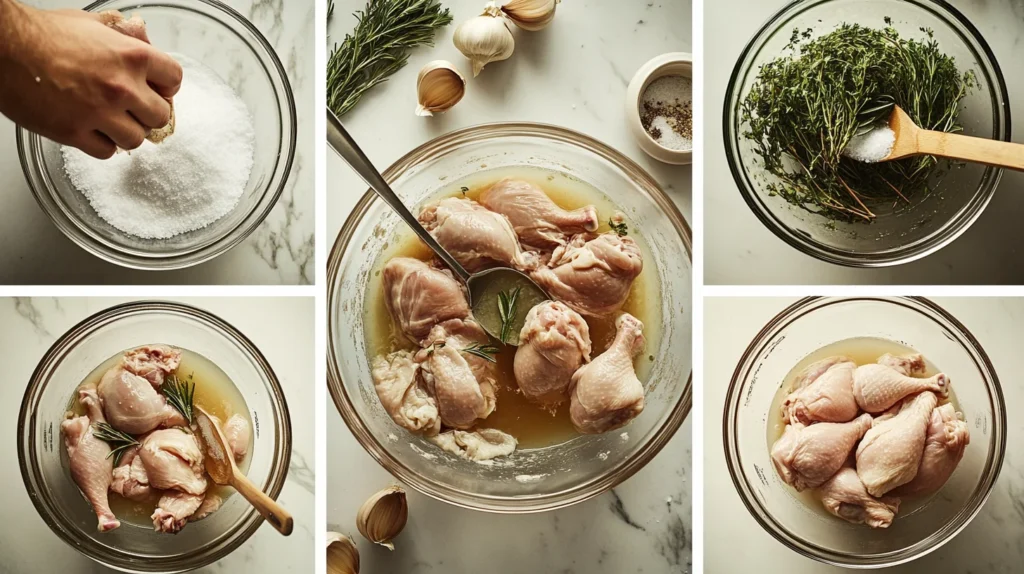
Brining chicken may seem intimidating at first, but it’s a straightforward process that anyone can master. Whether you’re using a wet brine or a dry brine, the steps below will guide you through the process to achieve perfectly seasoned, juicy chicken every time.
Prepare the Brine Mixture
For Wet Brine:
- Dissolve Salt and Sugar: Combine the salt and sugar in warm water to help them dissolve quickly. For every gallon of water, use 1 cup of salt and ½ to 1 cup of sugar.
- Cool the Brine: Allow the brine to cool completely to room temperature, then chill it further by adding ice cubes or refrigerating it. The brine must be cold before the chicken is added to ensure food safety.
- Add Flavorings: Incorporate herbs, spices, citrus zest, or garlic cloves to infuse the chicken with additional flavors.
For Dry Brine:
- Mix Seasonings: Combine kosher salt with any additional spices or herbs. A basic formula is 1 teaspoon of salt per pound of chicken. Popular additions include smoked paprika, black pepper, and dried thyme.
- Create an Even Rub: Mix the dry ingredients thoroughly for even distribution.
Select the Right Container
Choosing the proper container is critical to ensure the chicken is fully submerged (wet brine) or evenly coated (dry brine).
- For Wet Brine:
Use a large, non-reactive container such as:- A food-safe plastic bucket.
- A large glass bowl.
- A resealable plastic bag for smaller cuts.
- For Dry Brine:
A rimmed baking sheet or shallow dish works well, as it prevents any spills while keeping the chicken in a single layer.
Pro Tip: If using a plastic bag for wet brining, double-bag it to avoid leaks.
Submerge or Coat the Chicken
Wet Brine:
- Place the chicken in the container. Ensure it is fully submerged in the brine. Add a plate or a weight if needed to keep it submerged.
- Seal the container tightly to prevent spills.
Dry Brine:
- Rub the dry brine mixture generously over the entire surface of the chicken, including under the skin where possible.
- Place the chicken on a rack or in a shallow dish, skin side up, to allow air circulation.
Refrigerate the Chicken
Brining requires refrigeration to keep the chicken at a safe temperature while the process unfolds.
- Wet Brine: Refrigerate the container for the recommended time based on the size and cut of the chicken (refer to the timing chart in Part 4).
- Dry Brine: Leave the chicken uncovered in the refrigerator. This helps dry out the skin, which will result in better browning and crispiness during cooking.
Remove the Chicken and Prepare for Cooking
Once the brining time is complete:
- Rinse (if Necessary): Rinse the chicken under cold water to remove excess salt and seasonings, especially after wet brining. Some recipes may skip this step, but rinsing ensures the flavor isn’t overly salty.
- Pat Dry: Use paper towels to thoroughly dry the chicken. Dry skin is essential for achieving a crispy exterior.
Proceed with Cooking
Your brined chicken is now ready to cook! Depending on the recipe, you can:
- Roast it for tender and juicy meat with crispy skin.
- Grill it for smoky, charred flavors.
- Fry it for a flavorful and moist interior with a golden crust.
Tips for Brining Success
- Use Kosher Salt: Unlike table salt, kosher salt dissolves more easily and doesn’t contain additives that can affect the brine.
- Don’t Over-Brine: Leaving the chicken in the brine for too long can result in overly salty or mushy meat.
- Plan Ahead: Brining takes time, so be sure to factor this into your cooking schedule.
This step-by-step guide makes brining chicken a foolproof process. Whether you’re a seasoned cook or a beginner, following these instructions will help you achieve restaurant-quality results at home.
Tips, Mistakes to Avoid, and Recipes for Brined Chicken
Tips for Successful Brining
Brining is a straightforward process, but a few extra tips can ensure you achieve the best possible results.
- Customize Your Brine: Experiment with different ingredients like soy sauce, apple cider, or fresh herbs to suit your desired flavor profile.
- Use Quality Salt: Opt for kosher or sea salt, as table salt can make the brine too salty due to its fine texture and additives.
- Maintain Proper Temperature: Always refrigerate your chicken while it brines to prevent bacterial growth.
- Dry Thoroughly Before Cooking: A dry surface leads to better browning, whether you’re roasting, grilling, or frying.
- Keep Brining Times in Check: Over-brining can result in overly salty or rubbery meat. Stick to the recommended times.
Common Mistakes to Avoid
Even seasoned cooks can make errors when brining. Here are common pitfalls and how to avoid them:
- Over-Salting the Brine:
Using too much salt can overpower the chicken. Always measure carefully and follow a tested brine ratio. - Using Reactive Containers:
Materials like aluminum or copper can react with the salt, altering the flavor and possibly leaching unwanted elements into the food. Stick to glass, stainless steel, or food-safe plastic. - Skipping the Rinse (When Necessary):
Failing to rinse after wet brining can leave excessive salt on the surface. Unless otherwise specified in a recipe, always rinse and dry your chicken. - Brining Too Long:
Timing is everything. Over-brining breaks down too many proteins, resulting in mushy meat. - Not Allowing the Skin to Dry:
For crispy skin, particularly when roasting or frying, ensure the chicken is patted dry and air-dried in the fridge if possible.
Delicious Recipes for Brined Chicken
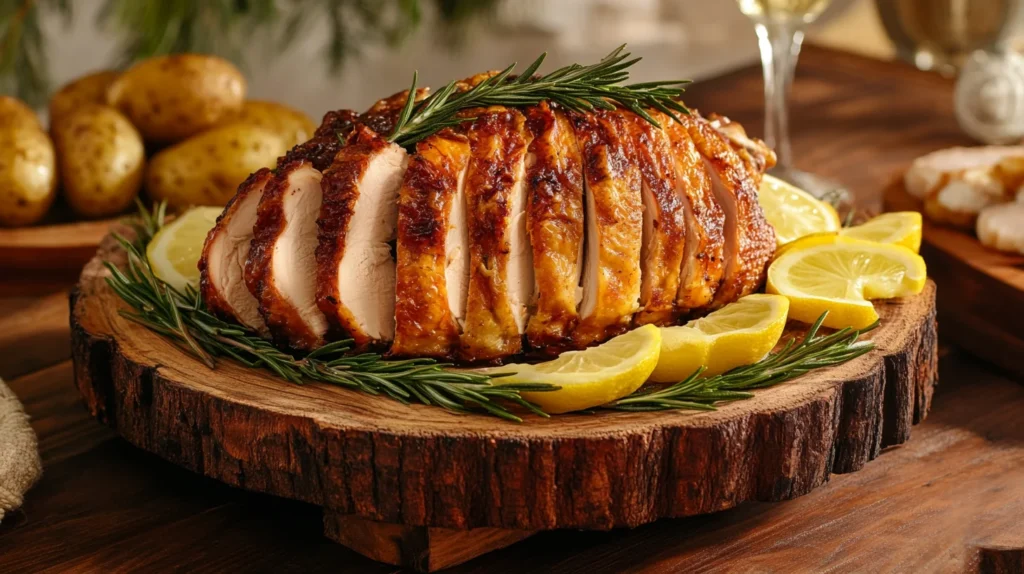
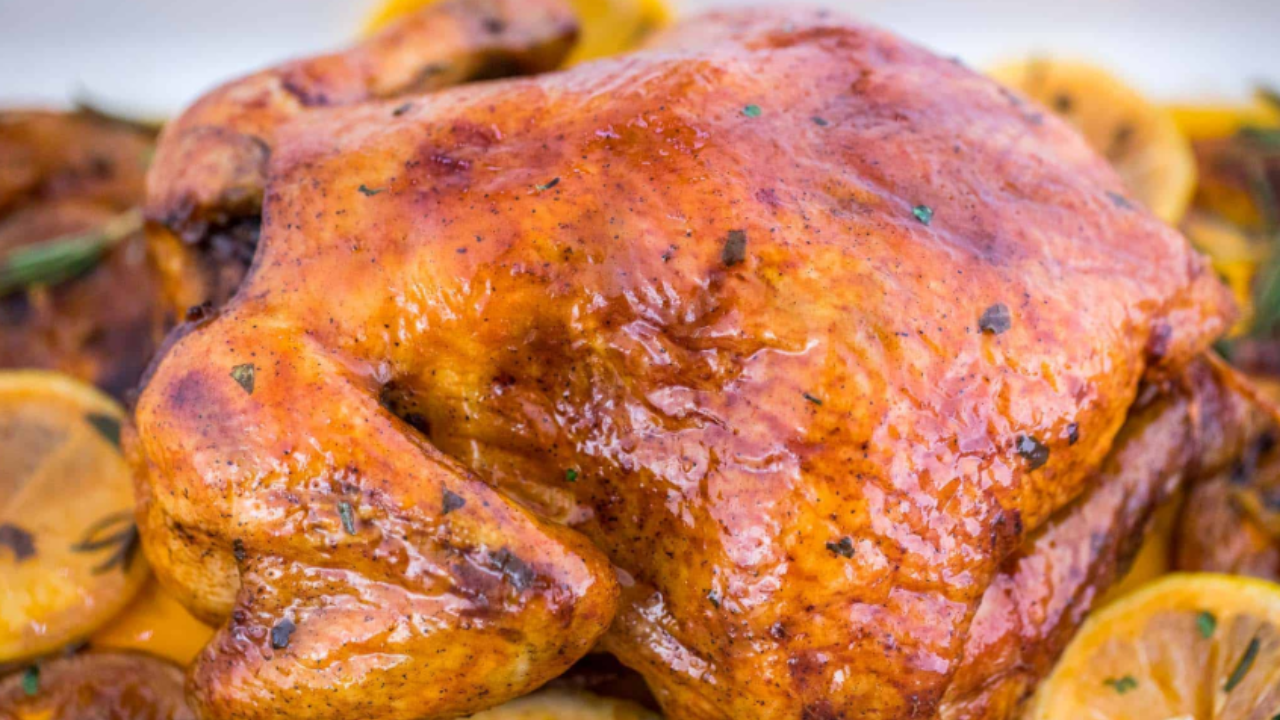
1. Roast Brined Chicken with Herbs
- Ingredients:
- 1 whole brined chicken.
- 2 tablespoons olive oil.
- 1 teaspoon each of rosemary, thyme, and garlic powder.
- Instructions:
- Preheat your oven to 375°F (190°C).
- Rub the chicken with olive oil and herbs.
- Roast for 1 hour and 20 minutes or until the internal temperature reaches 165°F (74°C).
- Let rest for 10 minutes before carving.
2. Grilled Lemon-Garlic Brined Chicken Breasts
- Ingredients:
- 4 brined chicken breasts.
- 2 tablespoons lemon juice.
- 1 tablespoon minced garlic.
- 1 teaspoon black pepper.
- Instructions:
- Preheat the grill to medium-high heat.
- Brush chicken with lemon juice and sprinkle with garlic and pepper.
- Grill for 5-7 minutes per side, ensuring an internal temperature of 165°F (74°C).
3. Southern Fried Brined Chicken
- Ingredients:
- 8 brined chicken drumsticks.
- 2 cups buttermilk.
- 2 cups flour seasoned with paprika, cayenne, salt, and pepper.
- Oil for frying.
- Instructions:
- Dip chicken in buttermilk, then dredge in seasoned flour.
- Heat oil to 350°F (175°C).
- Fry for 12-15 minutes, turning occasionally, until golden brown and cooked through.
FAQs About Brining Chicken
- How much salt do I need per pound of chicken?
- Use 1 teaspoon of kosher salt per pound for a dry brine or 1 cup per gallon of water for a wet brine.
- Can I brine chicken with skin on?
- Yes, and it’s highly recommended. The brine flavors the meat beneath the skin while also enhancing the skin’s texture during cooking.
- What’s the difference between brining and marinating?
- Brining focuses on moisture retention and seasoning through salt, while marinating primarily adds flavor using acidic ingredients like vinegar or citrus.
- Do I need to rinse chicken after brining?
- It depends. For most wet brines, rinsing is recommended to remove excess salt. For dry brines, rinsing isn’t always necessary, but you should still pat the chicken dry.
- Is it safe to reuse brine?
- No. Brine used for raw chicken can harbor bacteria and should always be discarded after use.
- Can I freeze chicken after brining?
- Yes, but make sure to dry it thoroughly first to prevent ice crystals from forming.
Conclusion
Brining chicken is a simple yet powerful technique that guarantees juicy, flavorful results. By understanding the science behind brining, mastering the perfect formula, and avoiding common mistakes, you can elevate any chicken dish. Whether you’re grilling, frying, or roasting, brining adds that extra layer of perfection to your meals.
Now, it’s time to put these insights into practice try brining your next chicken dish and enjoy the delicious transformation! 😊
Brining Chicken
Equipment
- Large mixing bowl or stockpot
- Measuring cups and spoons
- Whisk or spoon (for stirring)
- Plastic wrap or lid (to cover)
- Refrigerator
- Paper towels
- Ziplock bag (optional for small cuts)
Ingredients
- Basic Brine
- 4 cups 1 quart water
- ¼ cup kosher salt or 3 tbsp table salt
- ¼ cup sugar optional
- 2 cups ice cubes or cold water
- Optional Flavor Enhancers
- 1 tbsp black peppercorns
- 2 cloves garlic minced or smashed
- 1 bay leaf
- 1 tbsp fresh herbs rosemary, thyme, or sage
- 1 tbsp soy sauce or Worcestershire sauce
- 1 tbsp apple cider vinegar or lemon juice
- Chicken
- 4 bone-in skin-on chicken thighs or
- 2 whole chicken breasts or
- 1 whole chicken increase brine proportionally
Instructions
- Prepare the Brine:
- In a large pot, combine water, salt, and sugar. Stir until fully dissolved.
- Add optional herbs, spices, and aromatics if using.
- Pour in ice cubes or additional cold water to cool the brine completely.
- Brine the Chicken:
- Submerge the chicken in the brine, ensuring it’s fully covered.
- Cover the container and refrigerate. Use the following brining times based on the cut:
- Chicken breasts: 30 minutes – 1 hour
- Bone-in thighs or drumsticks: 1–2 hours
- Whole chicken: 8–12 hours (overnight)
- Rinse and Dry:
- Remove the chicken from the brine and rinse under cold water to remove excess salt.
- Pat dry thoroughly with paper towels.
- Let it air-dry in the refrigerator for 30 minutes for crispier skin when cooking.
- Cook as Desired:
- Roast, grill, pan-fry, or bake the chicken using your preferred recipe.
- Details
- Prep Time: 10 minutes
- Cook Time: 0 minutes (depends on the final cooking method)
- Total Time: 1–12 hours (depending on brining time)
- Yield: Serves 2–4
- Category: Main Course
- Method: Brining
- Cuisine: Universal
- Diet: Gluten-Free, Dairy-Free, Paleo (without sugar), Keto-Friendly (without sugar)
- Keywords
- Brining chicken, how to brine chicken, juicy chicken, saltwater brine, moist chicken, chicken prep, flavor-enhancing techniques
- Nutrition (Per 4 oz Serving, Estimated)
- (Note: Brining does not add many calories but increases sodium content.)
- Serving Size: 4 oz (uncooked)
- Calories: 120
- Sugar: 1g (if using sugar in brine)
- Sodium: 800–1000mg (varies)
- Fat: 3g
- Saturated Fat: 0.8g
- Unsaturated Fat: 2.2g
- Trans Fat: 0g
- Carbohydrates: 1g
- Fiber: 0g
- Protein: 22g
- Cholesterol: 65mg
Notes
Sugar in Brine? It adds slight sweetness and enhances browning, but it’s optional.
Brining Too Long? Over-brining can make the meat too salty and mushy. Stick to recommended times.
Dry Brine Alternative: Instead of liquid brine, rub salt directly on the chicken and let it rest uncovered in the fridge for 12–24 hours.