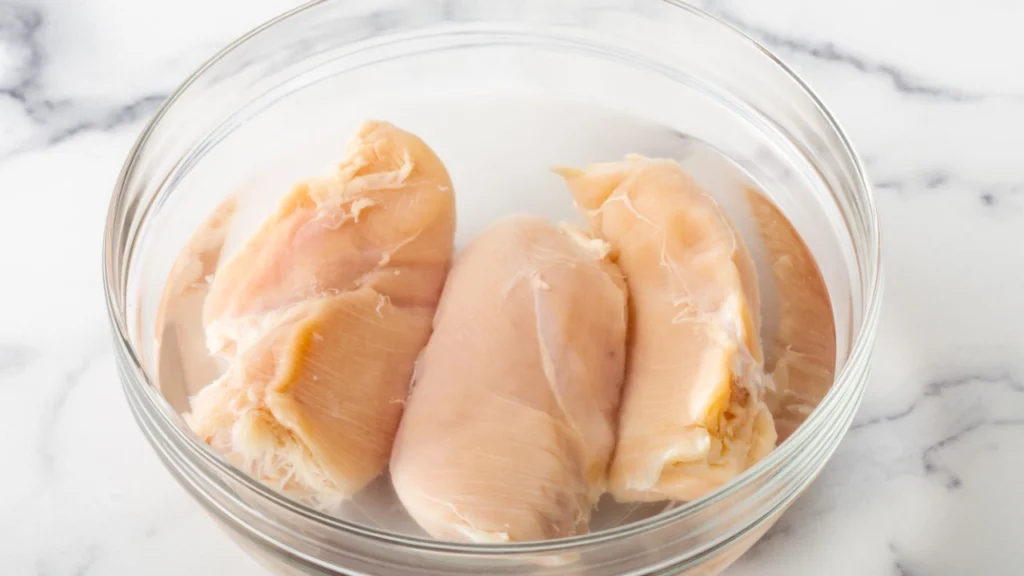
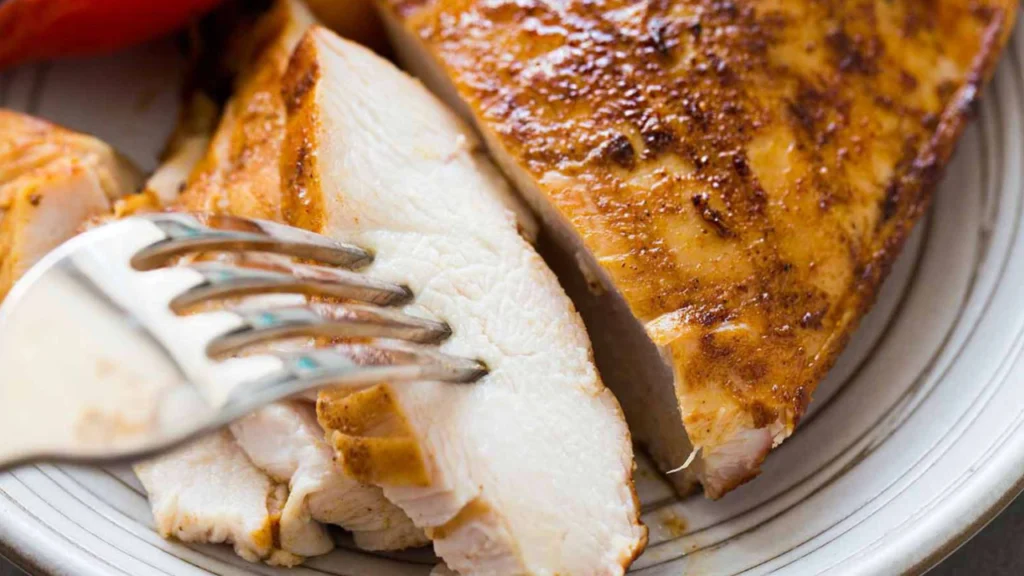
Brine for Chicken Breast is the key to keeping chicken breast tender and flavorful, preventing it from drying out during cooking. This simple yet effective technique enhances juiciness and taste, making it a must-know for both home cooks and chefs. In this guide, we’ll cover everything from the basics of brining to expert tips and recipes to help you achieve perfectly brined chicken breast every time. Let’s get started!
Table of Contents
What is Brining?
Brining is a culinary technique that involves soaking meat in a solution of water and salt (wet brine) or coating it with a mixture of salt and spices (dry brine) before cooking. The process enhances the meat’s flavor, tenderness, and juiciness by allowing it to absorb the brining solution, resulting in a more flavorful and moist end product.
Historically, brining was used as a preservation method. Before refrigeration, salt was a critical ingredient for extending the shelf life of meat. Over time, cooks discovered that brining also improved texture and flavor, making it a staple technique in kitchens around the world.
How Does Brining Work?
Brining works through the principles of osmosis and diffusion. Here’s a simplified explanation:
- Osmosis: When meat is placed in a salt solution, water moves from the brine into the meat cells, hydrating the muscle fibers.
- Diffusion of Salt: Salt penetrates the meat, breaking down proteins and creating a tender texture. This process also locks in moisture, preventing the meat from drying out during cooking.
- Flavor Absorption: Any additional ingredients in the brine, such as herbs, spices, or sugar, are absorbed into the meat, infusing it with complex and delicious flavors.
Why Brining is Perfect for Chicken Breast
Chicken breast is a lean cut with very little fat, making it prone to drying out, especially during high-heat cooking methods like grilling or baking. Brining is the ultimate solution to this issue. By increasing the moisture content and adding seasoning directly into the meat, brining transforms the texture and flavor of chicken breast.
Different Types of Brines
There are two main types of brines: wet brine and dry brine. Each method has its own advantages and is suited for specific situations.
Wet Brine
A wet brine involves submerging the chicken breast in a mixture of water, salt, and additional seasonings. This method is ideal for those who want to infuse their chicken with a variety of flavors while ensuring it remains juicy.
- Pros: Even seasoning, adds moisture, and works well for large batches.
- Cons: Requires space for storage and may take slightly longer.
Dry Brine
A dry brine uses only salt and seasonings rubbed directly onto the chicken. The salt draws out moisture from the surface of the meat, which then gets reabsorbed along with the added seasonings.
- Pros: Easier to manage, no additional equipment needed, and creates a crispy skin when cooked.
- Cons: Can result in slightly less moisture retention compared to wet brine.
Benefits of Brining Chicken Breast
Brining offers several benefits that elevate the texture, flavor, and overall quality of chicken breast. Let’s explore these advantages in detail:
Enhanced Flavor
Salt is a natural flavor enhancer, and when combined with additional aromatics like herbs, spices, and citrus, it penetrates deep into the chicken breast. This results in a dish that’s not only seasoned on the surface but flavorful throughout. By customizing your brine with ingredients like garlic, rosemary, or soy sauce, you can create unique flavor profiles suited to various cuisines.
Moisture Retention
Chicken breast is naturally lean, which makes it prone to drying out during cooking. Brining helps combat this issue by increasing the meat’s water content. The salt in the brine breaks down muscle proteins, allowing the meat to retain more moisture. This ensures that the chicken breast stays juicy, even when cooked at high temperatures.
Improved Texture
A properly brined chicken breast has a noticeably tender texture. The salt in the brine restructures the proteins in the meat, preventing them from contracting too tightly during cooking. This process results in a succulent bite, with meat that’s soft and easy to chew.
Versatility in Cooking Methods
Whether you’re grilling, baking, frying, or even poaching, brined chicken breast adapts beautifully to various cooking methods. The added moisture and flavor ensure excellent results, regardless of the technique you choose.
Consistent Results
Even if you’re not an experienced cook, brining gives you a forgiving margin for error. It helps balance seasoning, enhances juiciness, and ensures even cooking, making it a foolproof technique for anyone looking to elevate their chicken dishes.
Why Brining Beats Marinades
While marinades are often used for flavoring meat, they don’t offer the same benefits as brining. Here’s why brining is superior for chicken breast:
- Moisture Addition: Marinades sit on the surface of the meat, while brining penetrates deeply and adds moisture.
- Even Seasoning: Brines distribute salt and flavor evenly throughout the meat, whereas marinades can sometimes result in patchy seasoning.
- Tenderness: The salt in brines has a tenderizing effect, which marinades often lack unless they contain acidic components.
Conclusion of Benefits
By enhancing flavor, locking in moisture, and improving texture, brining is the ultimate technique for perfecting chicken breast. Its versatility and consistent results make it an essential tool for home cooks and professional chefs alike.
How to Brine Chicken Breast
Brining chicken breast may seem like a complex technique, but it’s surprisingly straightforward. Whether you prefer a wet brine or a dry brine, following the correct steps will ensure success. Here’s a detailed guide to help you brine chicken breast perfectly every time.
Wet Brine Recipe and Instructions

A wet brine involves submerging the chicken breast in a flavorful solution. This method is ideal for adding moisture and creating balanced seasoning.
Ingredients:
- 4 cups (1 liter) of water
- 1/4 cup (60 grams) of salt (kosher or sea salt works best)
- 2 tablespoons of sugar (optional, for added flavor)
- Aromatics (e.g., garlic cloves, bay leaves, peppercorns, fresh herbs like rosemary or thyme)
- 2-4 chicken breasts
Steps:
- Prepare the Brine Solution:
In a large bowl or pot, combine the water and salt. Stir until the salt is fully dissolved. If using sugar and aromatics, add them now. - Cool the Brine:
If you’ve heated the water to dissolve the ingredients, allow the brine to cool completely. Never add chicken to a hot brine, as it can start cooking the meat prematurely. - Submerge the Chicken Breast:
Place the chicken breasts in the brine, ensuring they are fully submerged. Use a heavy plate to weigh them down if necessary. - Refrigerate:
Cover the container and refrigerate for 1-2 hours. For thicker chicken breasts, you can brine for up to 4 hours. Avoid exceeding this time to prevent overly salty or mushy chicken. - Rinse and Pat Dry:
After brining, remove the chicken breasts from the solution, rinse them under cold water to remove excess salt, and pat them dry with paper towels. - Cook as Desired:
Brined chicken breast is ready to be grilled, baked, or pan-seared. No additional salt is needed in the recipe.
Dry Brine Recipe and Instructions
A dry brine uses salt and seasonings rubbed directly onto the chicken breast. It’s an excellent option for those who want maximum flavor without the need for large containers or extra liquid.
Ingredients:
- 1 tablespoon of kosher salt (adjust for the number of chicken breasts)
- 1 teaspoon of black pepper
- Additional seasonings (e.g., smoked paprika, garlic powder, lemon zest, dried thyme)
- 2-4 chicken breasts
Steps:
- Prepare the Dry Rub:
In a small bowl, mix the salt with your choice of spices and herbs. Adjust the quantity depending on the number of chicken breasts. - Apply the Brine:
Place the chicken breasts on a plate or tray. Generously sprinkle the salt mixture over the meat, ensuring even coverage. Rub it into the surface for better absorption. - Refrigerate Uncovered:
Allow the chicken breasts to rest in the refrigerator for 1-2 hours. Leaving them uncovered helps dry out the surface, which is especially useful if you’re aiming for crispy skin. - Rinse (Optional):
If you’ve used a heavy hand with the salt, you can lightly rinse the chicken before cooking. Otherwise, simply brush off excess seasoning. - Pat Dry and Cook:
Pat the chicken dry with paper towels and cook using your preferred method. Dry-brined chicken tends to brown beautifully when seared or roasted.
Wet Brine vs. Dry Brine: Which Should You Choose?
- Use a wet brine if you’re cooking chicken breast that’s particularly lean or has been frozen, as it helps add back moisture.
- Opt for a dry brine if you’re short on time or prefer a more concentrated flavor with a crispy exterior.
Both methods yield excellent results, so your choice will depend on the dish you’re preparing and your personal preferences.
Essential Ingredients for Brining Chicken Breast
Brining revolves around a few fundamental ingredients, but it also offers plenty of room for customization. Understanding the role of each ingredient can help you create brines that suit your flavor preferences and cooking goals.
Salt: The Foundation of Brining
Salt is the cornerstone of any brine, whether wet or dry. It serves multiple purposes:
- Flavor Enhancer: Salt penetrates the chicken breast, seasoning it evenly from the inside out.
- Moisture Retention: By altering the protein structure in the meat, salt allows the chicken to hold more water, keeping it juicy.
- Tenderizer: The breakdown of proteins softens the meat, resulting in a tender texture.
Types of Salt:
- Kosher Salt: The most commonly used salt for brining due to its coarse texture and clean taste.
- Sea Salt: Offers a natural, slightly mineral flavor.
- Table Salt: Can be used in a pinch but requires careful measurement since it’s finer and denser.
Pro Tip: Always measure salt by weight rather than volume, as different types have varying densities. For example, 1 tablespoon of table salt is much saltier than 1 tablespoon of kosher salt.
Water: The Base of a Wet Brine
Water serves as the primary medium in wet brines, helping to dissolve the salt and distribute it evenly around the chicken. Some cooks substitute part of the water with flavorful liquids like:
- Broth: Adds depth of flavor.
- Apple Cider or Juice: Provides a subtle sweetness and tang.
- Wine or Beer: Adds complexity for specific recipes.
For best results, use cold water to keep the brine temperature safe for the chicken.
Aromatics: Adding Flavor Dimensions
Aromatics are optional but highly recommended for elevating the flavor of your brine. Common additions include:
- Herbs: Rosemary, thyme, oregano, parsley, and bay leaves.
- Spices: Whole peppercorns, coriander seeds, mustard seeds, cloves, and cinnamon sticks.
- Citrus: Lemon, lime, or orange zest for a fresh and tangy profile.
- Garlic and Onion: Fresh cloves or slices for a savory base.
- Ginger: Perfect for Asian-inspired brines.
These ingredients infuse subtle, layered flavors into the chicken breast without overpowering its natural taste.
Sugar: Optional but Effective
Adding sugar to your brine creates a balanced sweet-and-savory profile. It also aids in caramelization during cooking, giving the chicken a golden-brown appearance.
- Brown Sugar: Adds richness and depth of flavor.
- Honey or Maple Syrup: Ideal for a natural sweetness in specialized recipes.
- White Sugar: Simple and versatile.
Pro Tip: Use sugar sparingly to avoid making the brine overly sweet.
Acidic Components: A Flavor Boost
Acids, such as vinegar or citrus juice, can be used in moderation to add tang and complexity to the brine. They also work well in marinades, although brines rely more on salt for tenderizing than acid.
Specialty Ingredients for Unique Brines
To experiment with flavors, consider adding these specialty ingredients:
- Soy Sauce or Tamari: Adds umami and depth.
- Chili Flakes: For a spicy kick.
- Coconut Milk: Perfect for tropical or Thai-inspired brines.
- Herb-infused Oils: Adds a luxurious touch in dry brines.
Basic Brine Ingredient Ratios
A general wet brine ratio is:
- 1 quart (4 cups) of water
- 1/4 cup of kosher salt
- 2 tablespoons of sugar (optional)
- 1-2 cups of additional aromatics or liquids for flavor
For dry brines, use 1 tablespoon of kosher salt per pound of chicken breast, supplemented with seasonings of your choice.
By understanding the role of each ingredient, you can craft a brine that perfectly complements your recipe. A well-balanced brine not only enhances the chicken’s natural qualities but also allows for endless flavor possibilities.

People also ask:
What is the best way to brine chicken breast?
The best way is to use a saltwater brine with optional sugar and flavor enhancers like herbs or spices. Submerge the chicken completely for even absorption.
What is the simple brine formula?
A simple formula is 4 cups of water, 1/4 cup of salt, and 1-2 tablespoons of sugar. Optional: add garlic, peppercorns, or herbs for flavor.
How long can you leave chicken breasts in brine?
Chicken breasts can be brined for 30 minutes to 4 hours. Avoid brining longer than 6 hours to prevent over-salting.
What to soak chicken breast in to make it tender?
Soak in a saltwater brine or buttermilk. Buttermilk is especially effective for tenderizing while adding flavor.
Conclusion
Brining is a simple yet game-changing technique that transforms chicken breast from dry and bland to juicy and flavorful. Using salt and osmosis, it boosts moisture retention, improves texture, and enhances taste. Whether you choose a wet or dry brine, both methods deliver impressive results. Since chicken breast is prone to drying out, brining ensures consistently tender and delicious dishes. Plus, it’s highly customizable infuse your brine with herbs, spices, or aromatics to match any flavor profile. Best of all, brining is easy for any home cook to master. So next time, give your chicken a brine and enjoy the difference! 🍗✨
For more Idea: Cookedjoy

Brine for Chicken Breast
Equipment
- Medium to large mixing bowl
- Whisk or spoon
- Measuring cups and spoons
- Zip-top bag or container with a lid (for marinating)
- Paper towels
Ingredients
- 4 boneless skinless chicken breasts
- 1/4 cup kosher salt
- 1/4 cup granulated sugar
- 4 cups cold water
- 2 cloves garlic smashed or minced
- 1 tsp black peppercorns crushed or whole
- 1 bay leaf
- Optional: 1 sprig of rosemary thyme, or any fresh herb for added flavor
Instructions
- Prepare the brine:
- In a mixing bowl, combine the cold water, kosher salt, and sugar. Stir until the salt and sugar have dissolved completely.
- Add aromatics:
- Add garlic, peppercorns, bay leaf, and any optional herbs to the brine. Stir gently to combine.
- Submerge the chicken:
- Place the chicken breasts in a large zip-top bag or a container with a lid. Pour the brine over the chicken, ensuring they are fully submerged.
- Refrigerate:
- Seal the bag or container and place it in the refrigerator for 30 minutes to 4 hours. (Do not exceed 4 hours to prevent overly salty chicken.)
- Rinse and dry:
- Once brining is complete, remove the chicken breasts from the brine. Rinse them under cold water to remove excess salt. Pat them dry with paper towels.
- Cook as desired:
- Grill, bake, or pan-fry the chicken breasts according to your preferred method.
- Details:
- Prep Time: 5 minutes
- Brining Time: 30 minutes to 4 hours
- Total Time: 35 minutes to 4 hours
- Yield: 4 servings
- Category: Main Dish, Chicken
- Method: Brining
- Cuisine: American
- Diet: Gluten-Free, Dairy-Free, Low-Carb
- Keywords:
- Juicy chicken, chicken breast brine, tender chicken, saltwater brine, chicken marinade, grilling chicken prep
- Nutrition (Per Serving – Approximate):
- Serving Size: 1 chicken breast (6 oz)
- Calories: 165 kcal
- Sugar: 1g
- Sodium: 450 mg (post-rinse)
- Total Fat: 3g
- Saturated Fat: 1g
- Unsaturated Fat: 2g
- Trans Fat: 0g
- Carbohydrates: 2g
- Fiber: 0g
- Protein: 31g
- Cholesterol: 85 mg
Notes
For added flavor, you can customize the brine with citrus (e.g., lemon slices), spices (e.g., paprika or cumin), or other herbs (e.g., thyme or parsley).
After brining, pat the chicken dry to ensure a nice sear if you’re grilling or pan-frying.
Always cook chicken to an internal temperature of 165°F (74°C) for safe consumption.
